Enjoy the journey, not just the destination

It’s an often (over) used quote in various forms across the internet but this morning in a Facebook conversation it actually seemed apt to use it.

A friend of mine had posted a picture of a hand carved avocado that judging by google is all over the internet, so I’m not too worried about reposting it here. (If it’s your image, please ping me a msg and I’ll happily credit it to you.). It’s an amazing bit of food art that took an hour to make.

Carved avocado

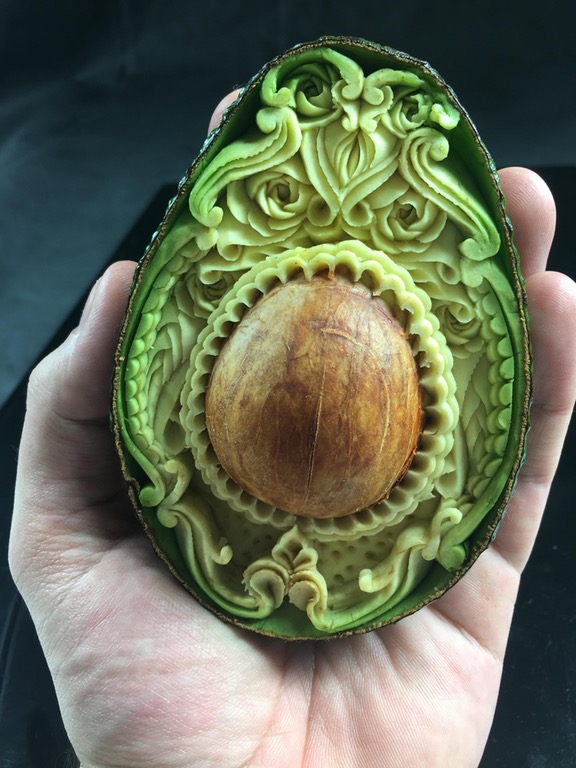
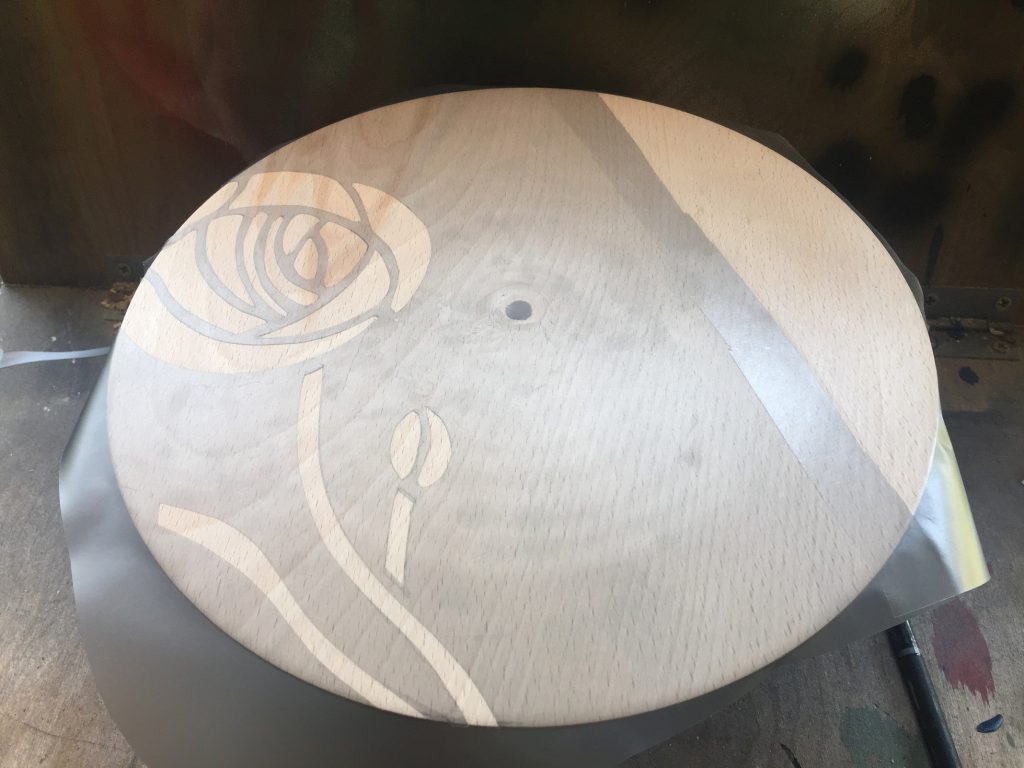
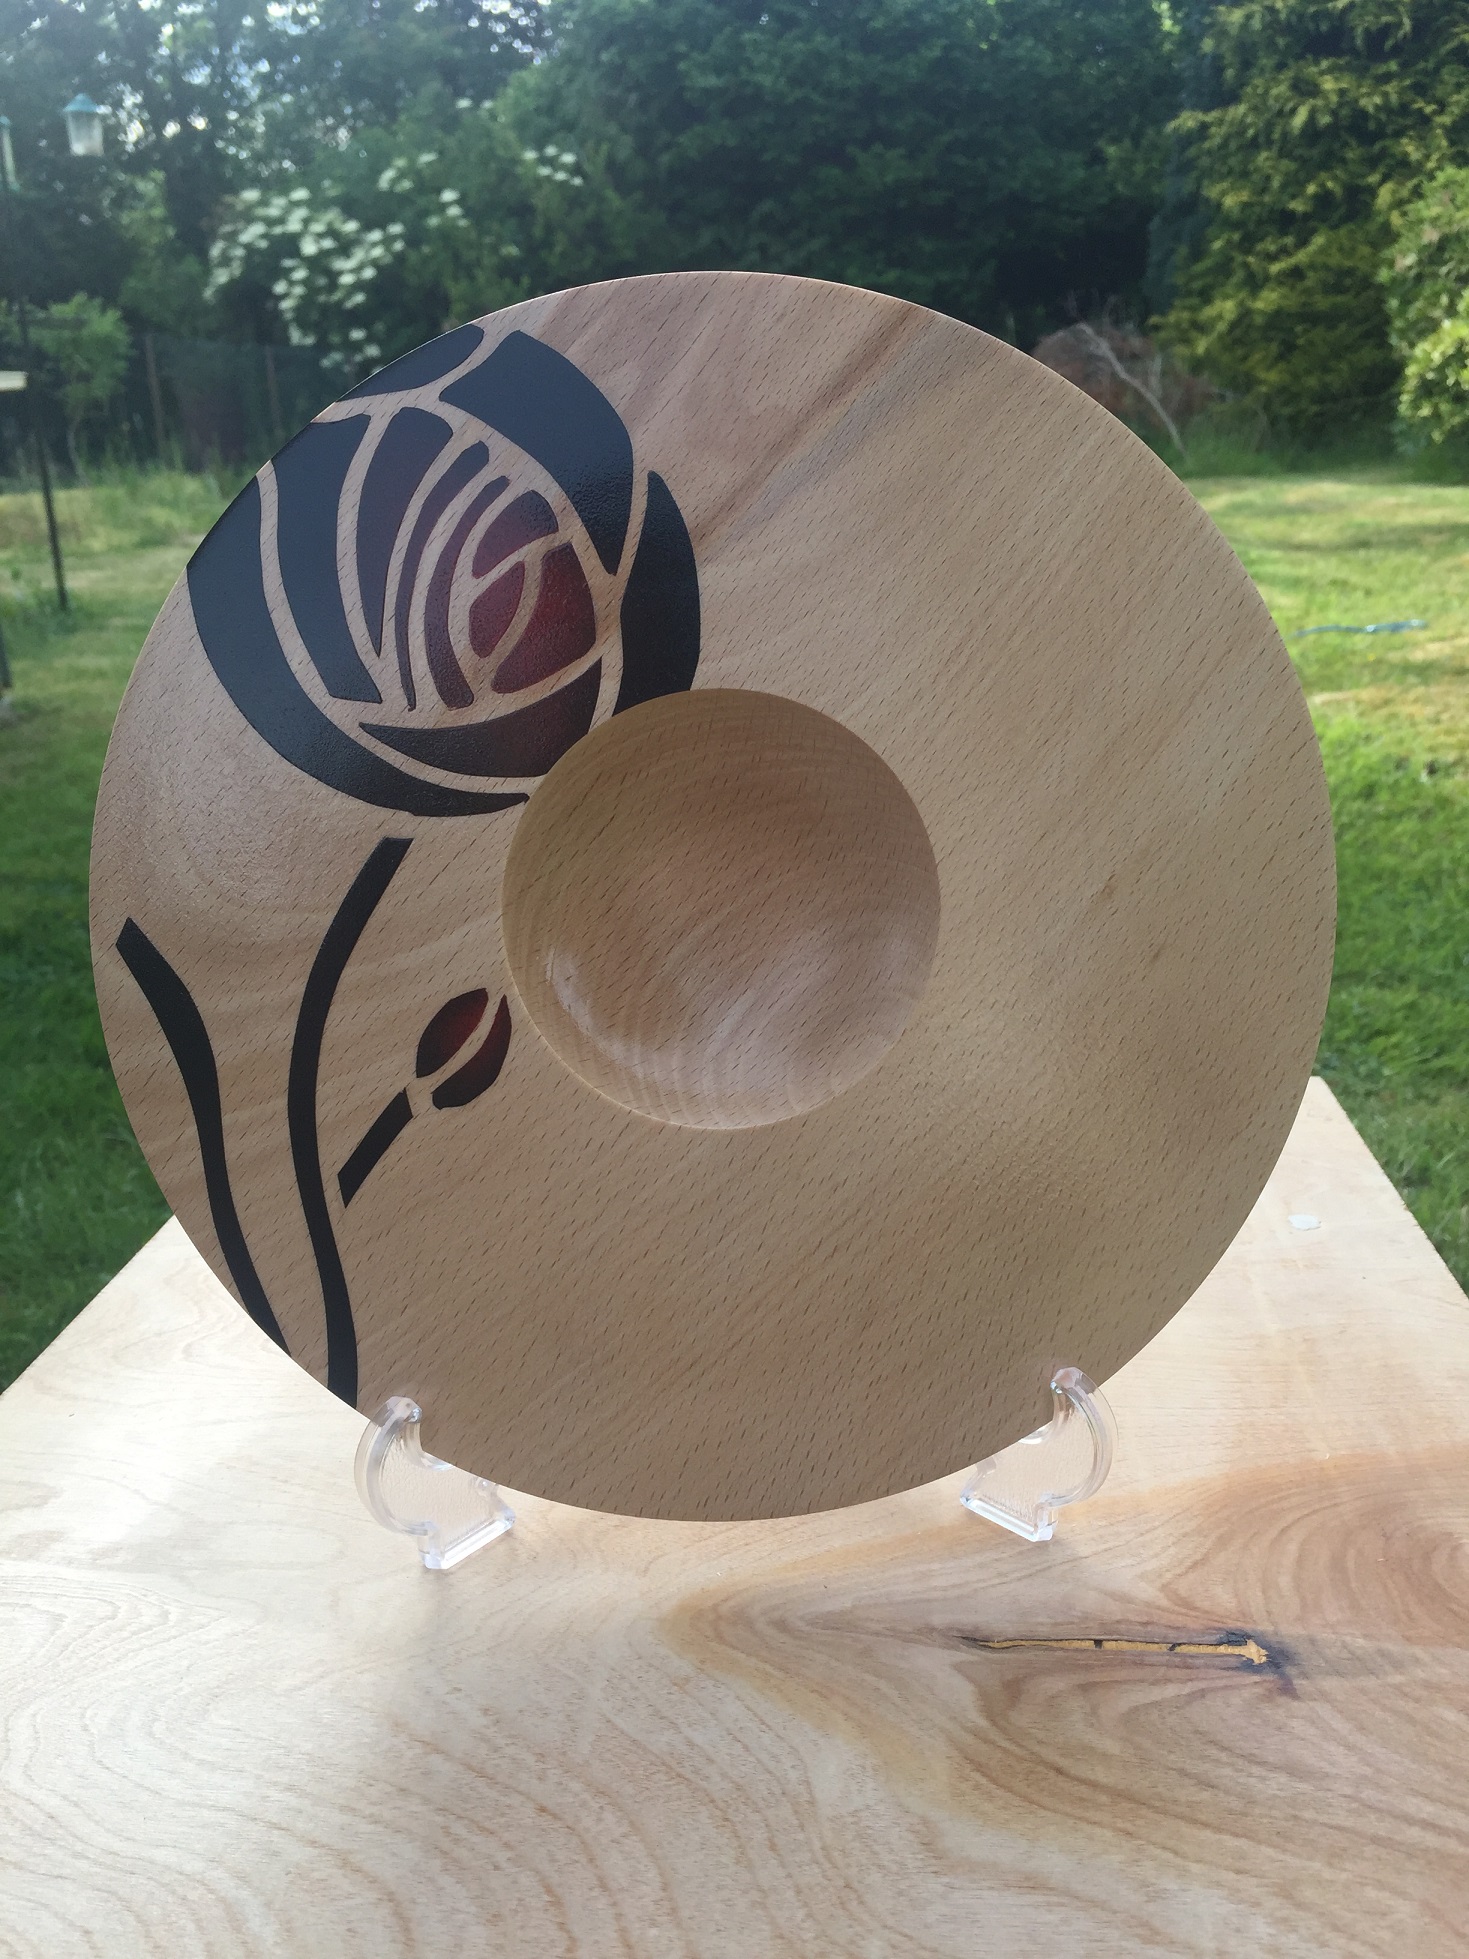
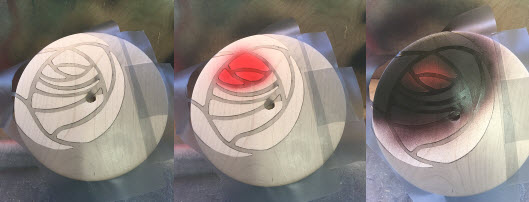
One of the comments on the photo was “One lost hour..” which is what triggered my response and also got me to thinking about the work I did in the workshop yesterday, playing with and developing an idea that takes the Rennie Rose you’ve seen in it’s previous form to an image that was influenced by some pictures of Glasgow Style stained glass panels.

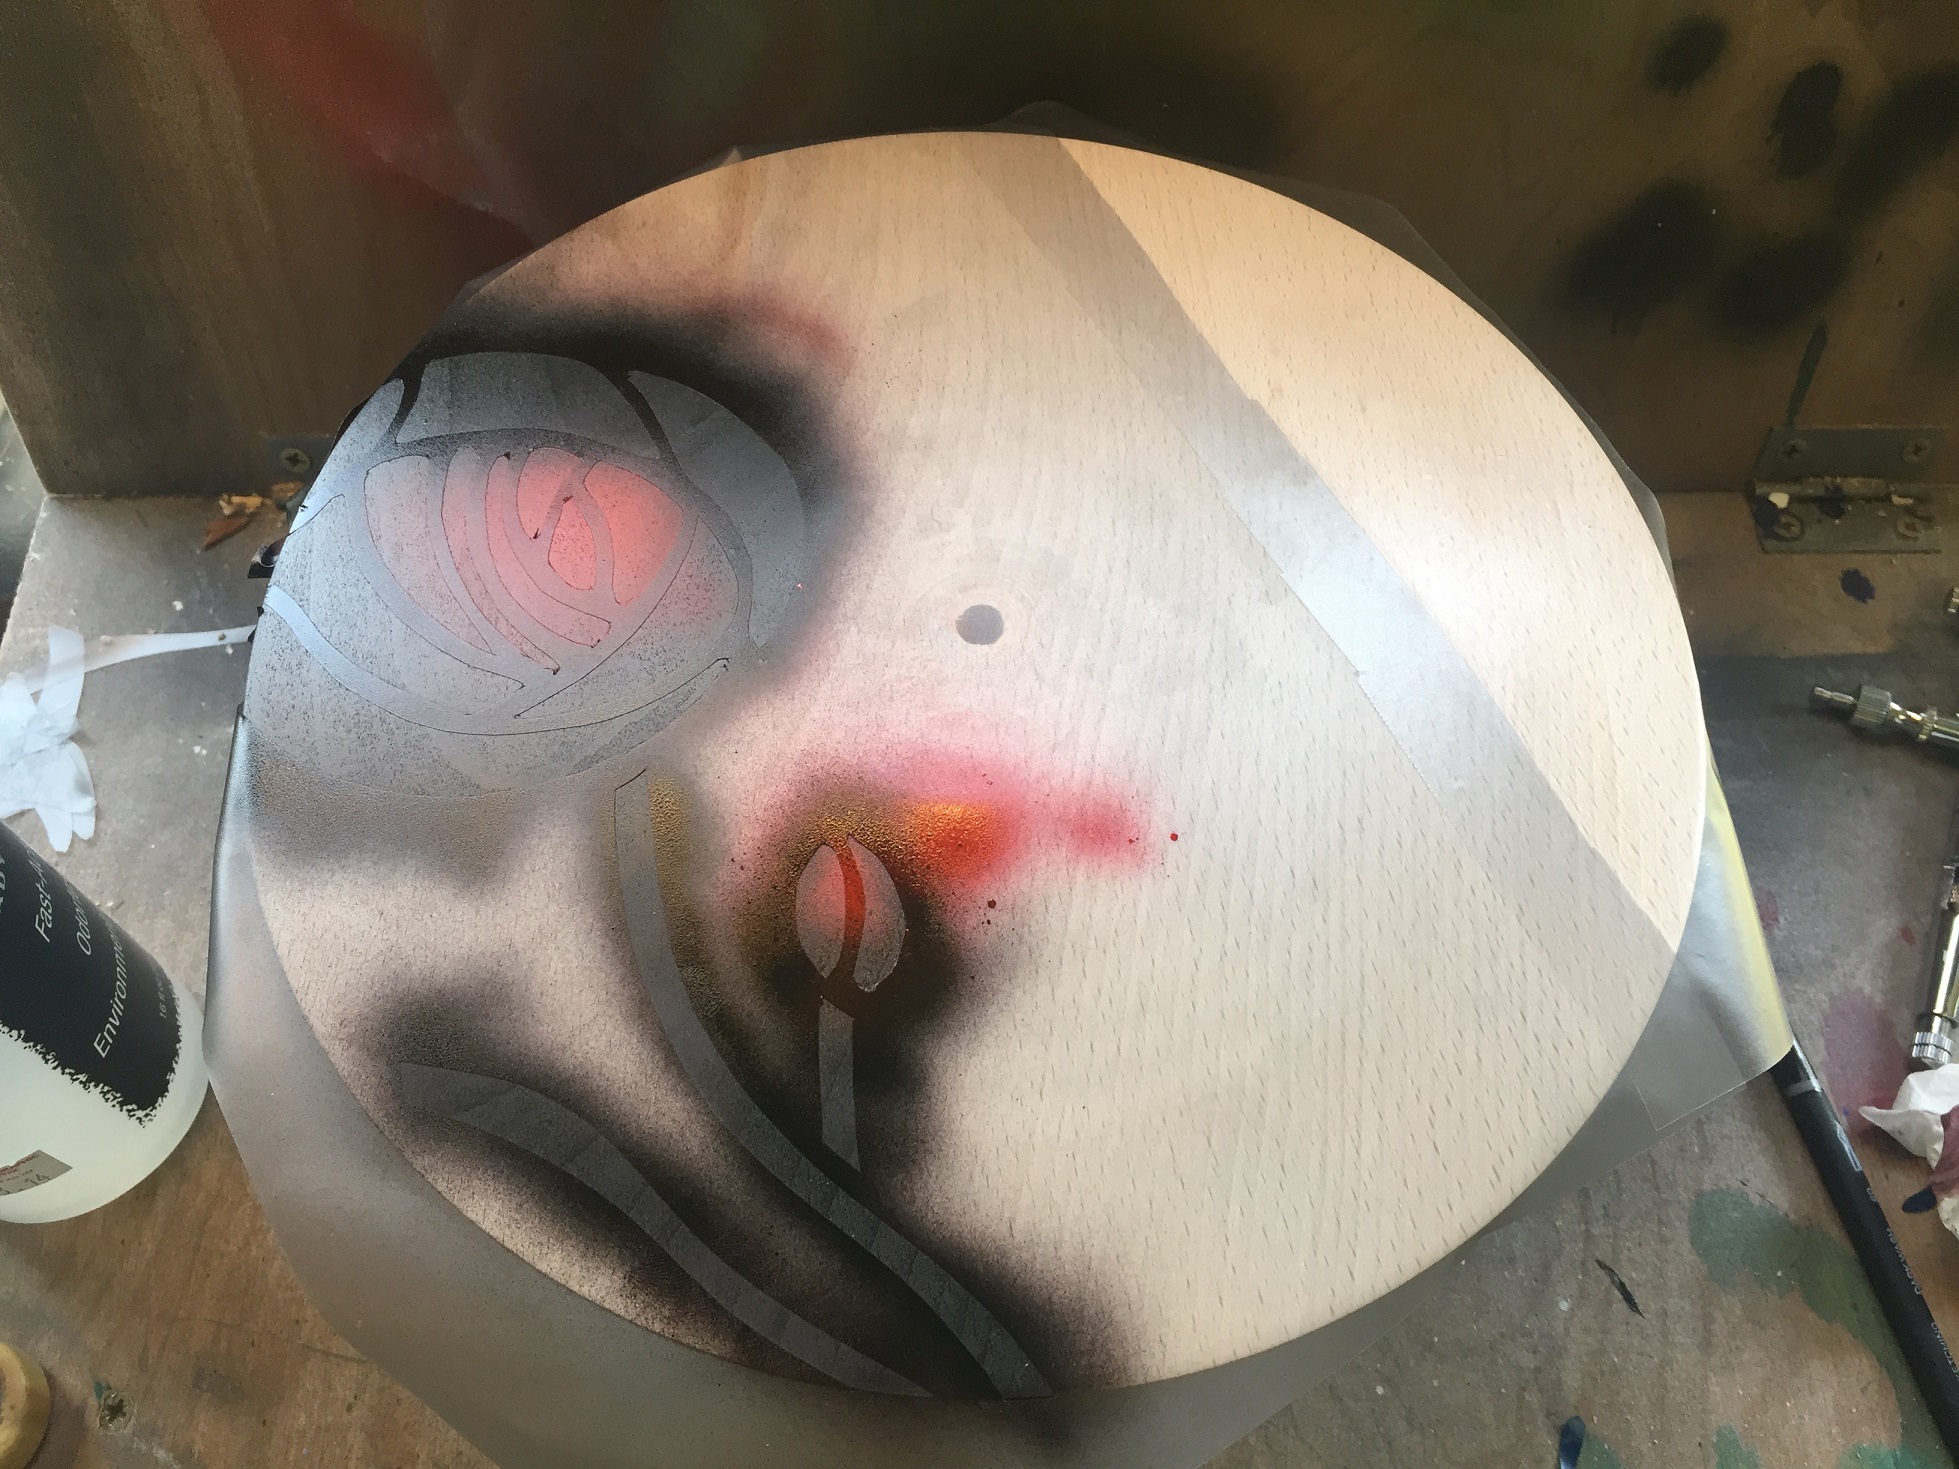
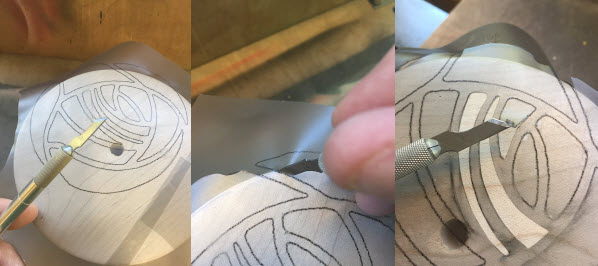
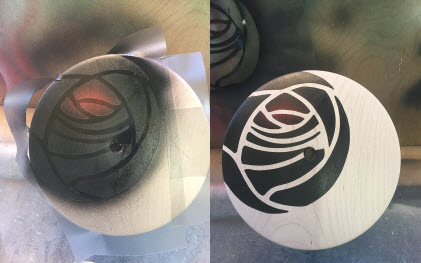
I had worked recently on the computer to create a vector based image of the panel that I had chosen to try and re-create, and on the computer the image worked quite well. What I didn’t account for is my lack of practice with the scalpel when it comes to cutting these Friskets out! (Sharp blades are the key!)Rennie Rose Pane
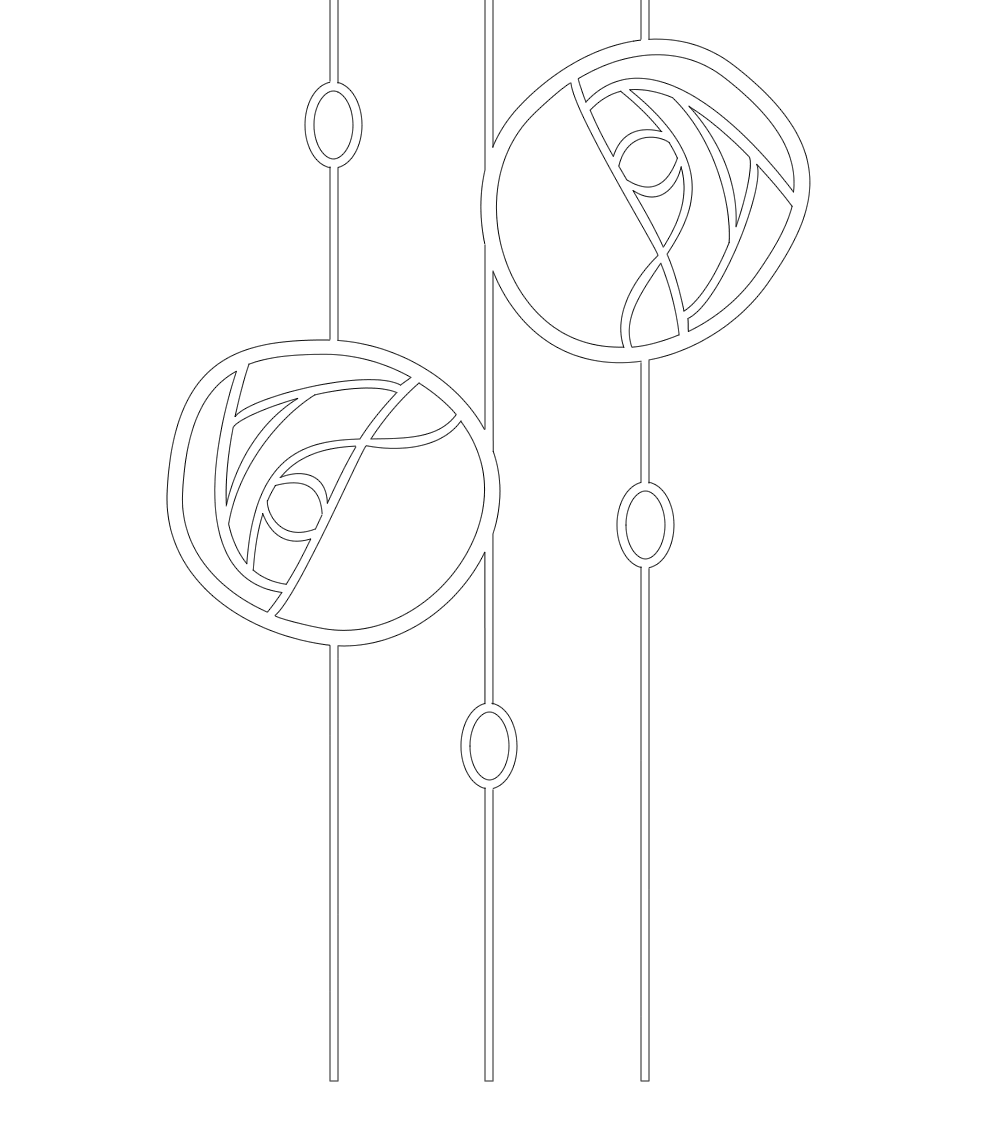
There’s a lot of long sweeping curves on this image and if you don’t keep the knife moving smoothly it becomes very visible once you’ve painted the object and removed the mask. Likewise on the straight sections, the use of a straight edge is important.

Rennie Panel Bowl

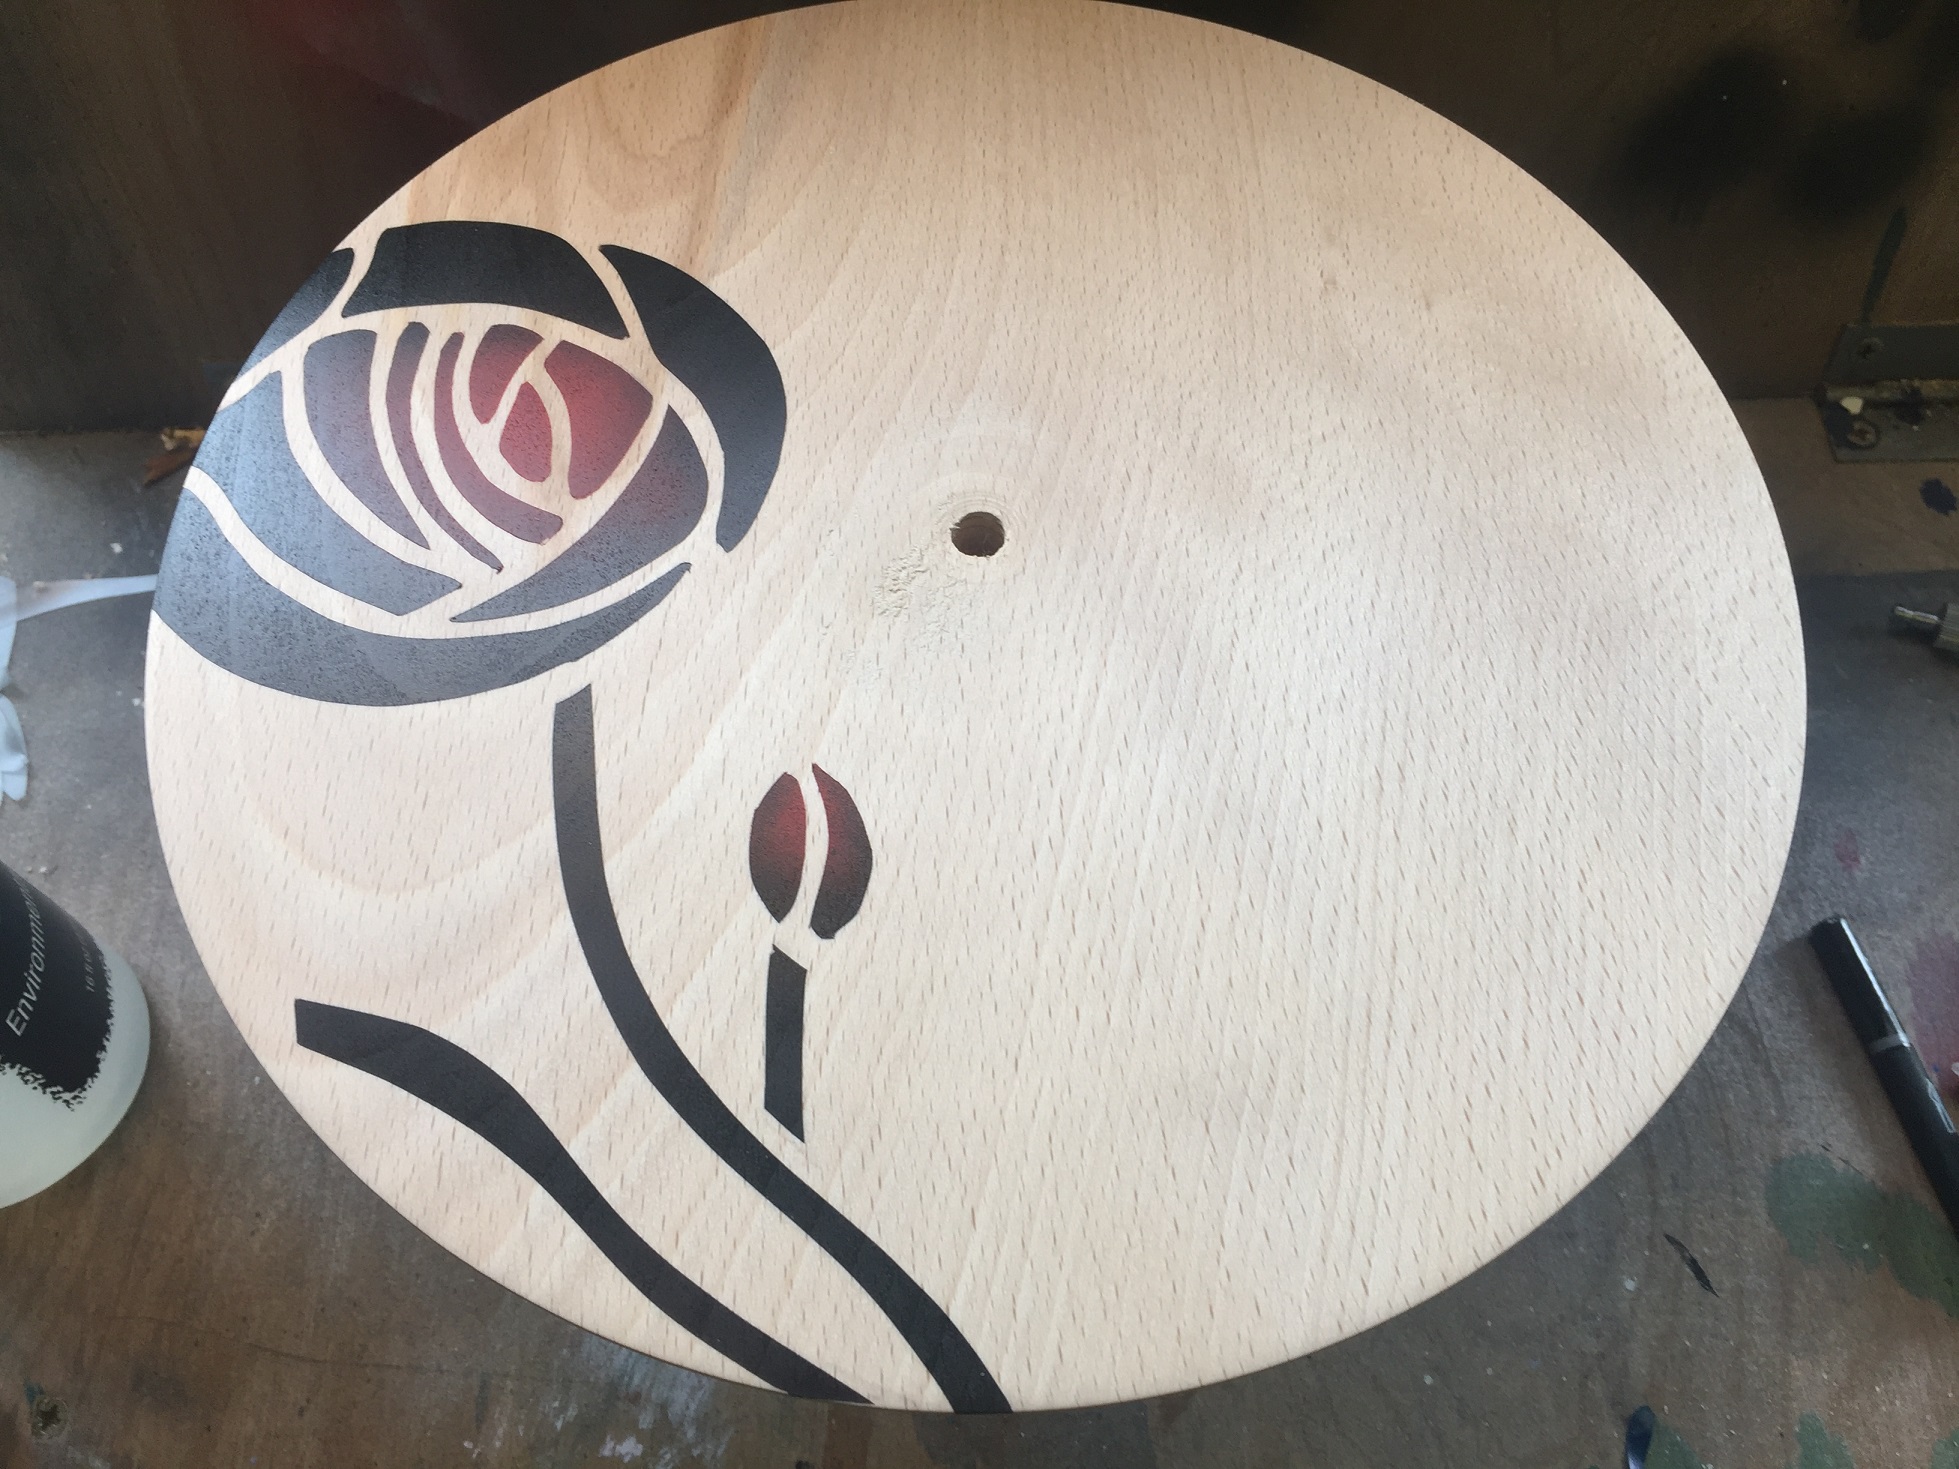
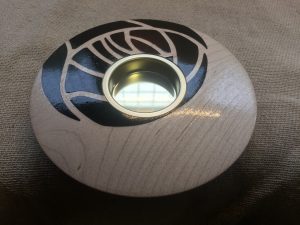
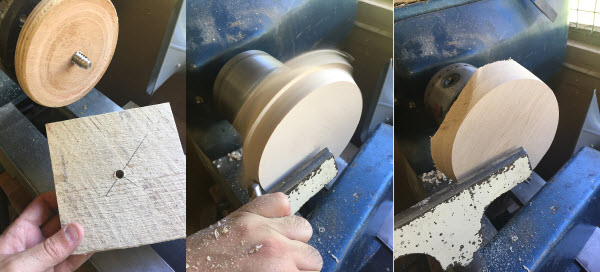
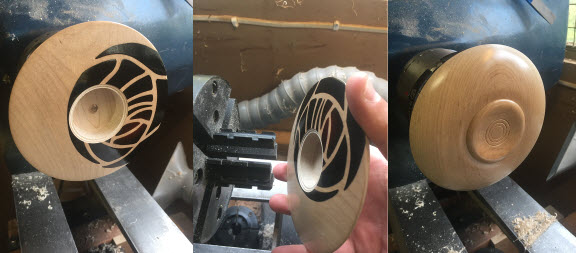
Whilst I wasn’t happy with the finished image on the bowl, I decided to remove the bowl form anyway so that I could see how the image developed. This gave me a chance to play with proportions and to practice some of the more delicate cuts that are needed when working on an already decorated piece.

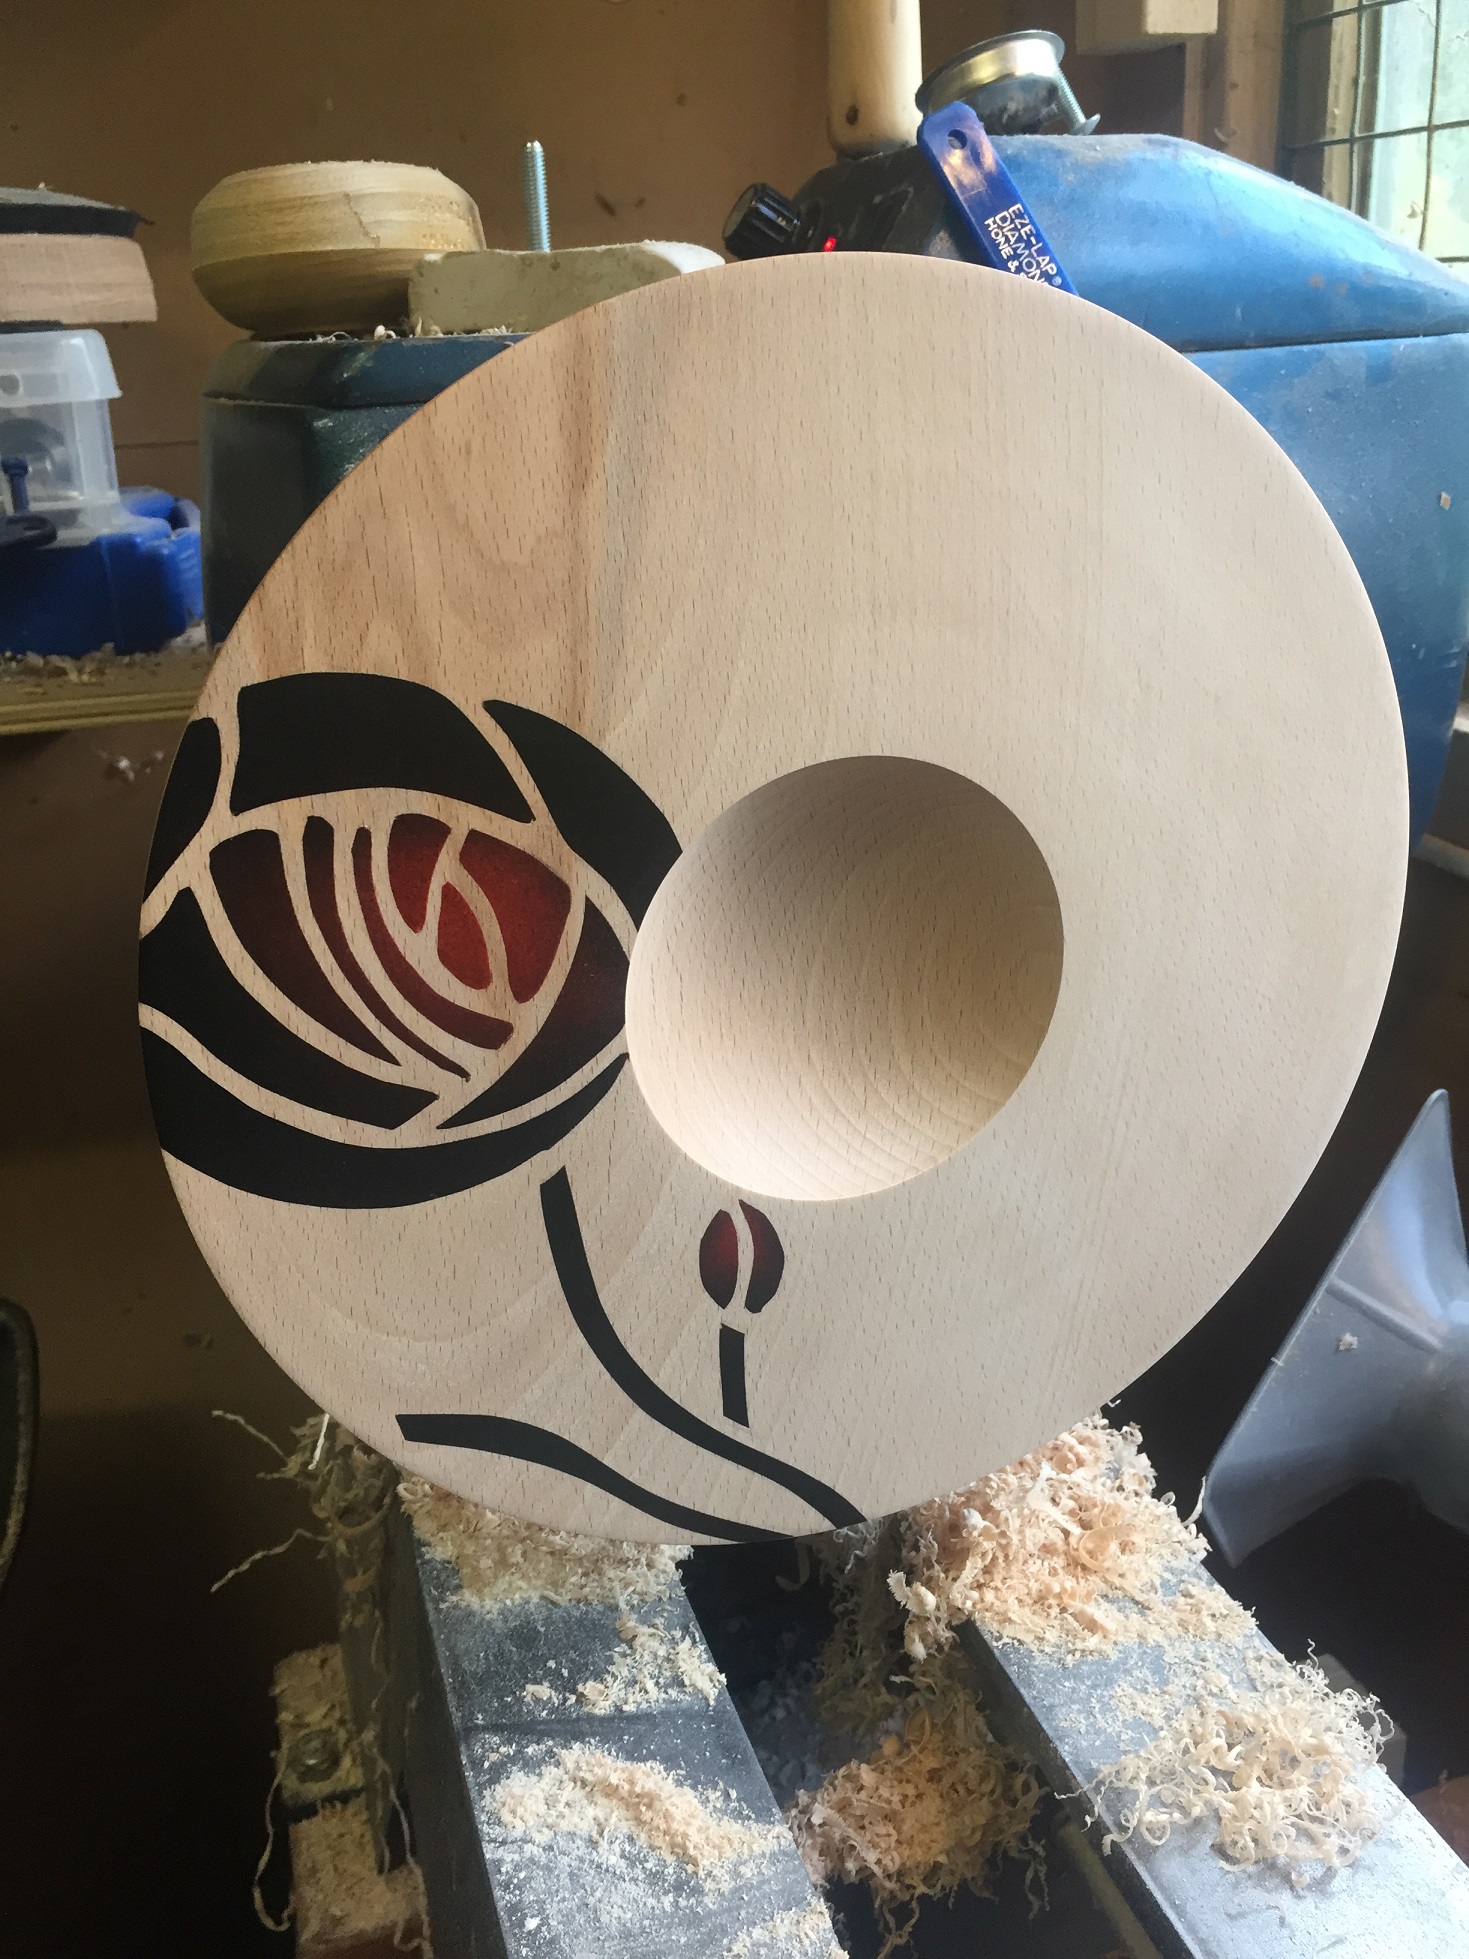
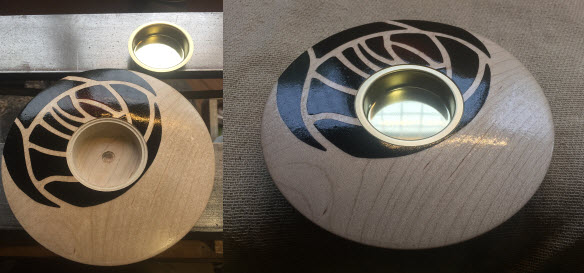
With the usual size bowl removed, the piece did not feel right and the bowl needed to be widened. It was at this point I had what the artist Bob Ross used to call “a happy little accident” that resulted in quite a major change to the bowl size. Taking this design opportunity for what it was, I decided to create a deeper bowl with a slight undercut to practice a cut that I’m not overly comfortable with.

This unfortunately upset the balance of the design completely and with a little prompting from the long suffering other half, decided to remove the design completely and turn a test/practice piece into a really nice looking Ash bowl.

Ash bowl

In the end, over the course of a few hours I was able to test and refine a number of skills, test a couple of new surface finish techniques that I wasn’t sure would work on airbrushed acrylic, challenge myself with some difficult cuts that I’m not comfortable with and in the end still create a pleasing bowl form that I would happily keep.

So whilst the destination changed slightly and I didn’t end up with the original intention, the journey itself was challenging and rewarding. There is no such thing as wasted time when accidents happen, merely an opportunity to test, challenge and develop yourself further.

Paul.

The Rennie Rose bowl commission

I was asked if I could make a larger version of the Rennie Rose tea light as a bowl. Never one to turn down a challenge I said of course.

This time I used tracing paper to create the initial design. This allowed me to work from a larger scale printout of the original rose design and then provided room to add some additional content in the form of a stem and a bud. The plan was for the Rose and stem to lie on the left side of the bowl, with the bud pointing towards the centre.

Using tracing paper allows me to rub a soft pencil on the back of the outline, then lay the tracing paper over the piece once the front has been turned and sanded. Then with care you can re-trace the outline of the design on top of the tracing paper, which leaves an imprint of the soft pencil in the same style that carbon paper would (but with a lot less mess and more control.)

Drawn outline

Once the design was on the wood, a large piece of frisket was placed over the top and the design cut out.

Cutout the frisket

Then the fun bit of adding some colour. First the Naphthol Red Light in the centre of the rose and the bud, followed by subsequent additions of Carbon Black to darken the red before it reaches full black at the outer edge of the rose. Then black on the stems and outer edges of the petals and bud.

First spray

The magic really happens when you first remove the frisket. It never ceases to amaze me how the image changes.

Mask Removed

With the mask removed, it’s time to take the centre of the bowl out and prepare the piece for a few coats of lacquer.

Finished and lacquered

The finished piece.

Paul.


Making the “Rennie Rose” tea light holder.

I’ve always been a fan of people like Nick Agar and Binh Pho who extend the boundaries of wood turning by combining additional media into their work.

Both are heavy users of colour and in particular the application of colour with airbrushes and indeed it was having Nick Agar attend and demonstrate at our club in 2016 that made me decided to upgrade my old (and rather rubbish) hobbyists airbrush for a much more professional and capable model.

Nick’s demonstrations to the club showed the use of airbrush masking  to create complex designs by allowing colours to be blended in defined areas as well as giving the ability to create crisp art without needing a strong ability in freehand drawing. This is a good thing as I am really not any good at drawing,  gave watercolours a try during an early search for a hobby but that withered away when I realised that I just wasn’t very good at drawing. What I am good at is computers, so taking a photo and creating a stencil from it is quite easy to achieve. When you then combine this stencil with airbrushing and wood turning we can create some quite stunning effects which I hope to bring to you via the pages of this blog!

For this first making of post, I want to show how we took a simple Charles Rennie Mackintosh design of a Rose and turned it into a wonderful Art Nouveau tea light holder for scented candles.

Completed Rennie Rose Tealight Holder

I needed a photo of a CRM design to start with, so I turned to google and found a suitable source image to start from. With this image loaded into Photoshop, I used the magic wand tool to start outlining the coloured areas that I wanted to form my stencil. With the selection placed over a fresh canvas, the stroke tool with a 1 pixel grey brush quickly places our stencil outline.

With the stencil ready in Photoshop and set to roughly the right size (10cms wide) for the tea light holder, I printed it directly onto the Artool Ultra Mask film that I was using. This great masking product happily runs through the ink jet, but you must remember to use a mid tone grey and set the inkjet to glossy paper, otherwise you end up with too much ink on the mask and it doesn’t dry.

That done, it’s off to the workshop to select a small piece of Maple (about 15 centimetres square. Drill a small mounting hole suitable for my screw chuck and then turn it to round.

Rennie Rose Roughing Out

Once the piece is running true, it’s time to turn a chucking point suitable for the C jaws on my Axminster chuck, then turn the piece around, true it up and then create a smooth face with a gentle curve out from the centre.

Rennie Rose Base Front Prep

Both sides were sanded smooth to 600 grit.. note the close extractor nozzle to remove the dust while sanding.. Wood dust is no joke and very harmful. I also have an ambient air filter running and most often wear a dust mask too.

Rennie Rose Applying Mask

With the backing paper removed, the mask is placed over the prepared piece, with the image offset to the top left. My plan will be to remove the hole for the tea light holder after the airbrush work is complete, but I don’t want to lose the whole design. With the mask attached, it’s time to cut out the pieces that I want to remove. (Note the type of blade. It’s a short acute angle blade which I find has less drag in the mask than a normal scalpel blade. I also find that if you point the heel of the blade at the line your following it makes it much easier to stick to the line.)

Rennie Rose Airbrushing In

With the mask firmly in place (I usually lay the backing film over the top and rub it firmly with a cloth which avoids getting too many oils from your fingers on the piece.) it’s time to start colouring. For this particular rose, it’s going to be a heavy black for the most part, with a hint of red peeking through. For this effect we have to start with the bright red (A few drops of Golden Hi-flow Naphthol Red Light) , so here I use the airbrush to lay a solid layer of red over the three central petals. Then I add a few drops of carbon black to the red already in the brush. By covering the nozzle of the airbrush with a cloth and letting the air flow, it causes a backflow into the airbrush paint cup, mixing the two colours for me. This allows me to start blending in black with a hint of red from the outside into the centre, leaving a small areas of red showing through.

Rennie Rose Final Remove Mask

Finally a few more drops of carbon black into the airbrush and another mix before filling in the final parts of the mask. After a few seconds, the final paint is dry and we can remove the mask from the piece, leaving a perfect image of the rose on the work (You can see the used mask on the backboard).

At this point, I then give the work around 5 coats of acrylic lacquer. This takes about and hour and a half to allow each coat to dry. Just before the final coat of lacquer I cut back the surface very gently with some 12000 grit micro mesh.

Rennie Rose Final Turning

With the lacquer fully cured, it’s time to hollow out the recess that the tea light cup will fit into. Then the piece is reversed onto a set of pin jaws and the chucking point turned into a pleasing foot with some decoration (no one likes an ugly bottom!)

The base is sanded to 600 grit and blended to the already finished area and then a few coats of lacquer applied to the base using the same technique.

Rennie Rose Finished

With the lacquer hardened all over, I glue in the tea light insert with a couple of drops of glue in the end grain area of the recess to allow for movement int he wood.

Finally, I give the piece a quick coating of renaissance wax to protect it from fingerprints and we’re done.

Paul.


Some of my recent items

The collection below is just some of the items that I’ve been making recently. I like to vary my work and although I’ve been making a lot of tealight holders of late, I’ve been varying the types and styles of decoration while I find a style that suits me.

I’m currently favouring two themes, the Cosmos series which features a very constellation influenced style. Lots of stars, streaks and other space style enhancements. The second theme is the Art Noveau style with a heavy influence from Charles Rennie Mackintosh, an architect and designer born in Glasgow in the 1860s.

A lot of these items are available for sale as I only tend to do craft fairs a couple of times a year. If you are interested, please drop me a message on Facebook via my page. fb.me/TheModernTurner

Starting a new venture…

If you’ve come to this page, chances are you know me from my real world job in IT. In real life, I’m a member of an exceptional community of people that live and breathe the same Microsoft products and travel around Europe evangelising at conferences about them. I’m also a consultant with a Microsoft gold partner and travel the UK helping clients with everything from new builds, improvements and sometimes troubleshooting to get them out of a sticky situation!

With such a focus on technical output, I needed something to take my mind off of the stresses of the job, something cheaper than engaging a full time therapist! So back in 2003 I decided to take up a hobby and as my family have a history of carpentry (Before Dad and I broke the tradition and did something different!) I decided it had to be something related to wood. I didn’t have the space for a full blown cabinet workshop so after seeing Norm Abhrams do it on the New Yankee workshop, I decided to give turning a go.

I bought a cheap lathe off of Ebay grabbed a few tools from a local shop (without any advice.. I mean how hard can it be..?..? I read a book…!), planked some wood I found onto the lathe and made it round.. (ish)..

I was hooked! Woodturning became my Hobby and I’m pleased to say that some 14 years later, I’m still doing it! (I swear my long suffering wife thought I was just going to give it up after a few months!).

During this time, my workshop was the garage with it’s rather rubbish asbestos roof, it leaked, my tools get damp, I couldn’t turn during the cold weather.. You get the picture?

For a lot of those 14 years I only turned for a few months of the year but what I did do, was join a local club and oh boy was that the best decision I could make! There’s a wealth of information to be had within a club, some of the old boys that belong have forgotten more about wood turning than I’ll ever know! My turning improved leaps and bounds over the years and I decided it was time to upgrade my workshop to a decent size building that was sealed to the elements and easy to heat. Even on the coldest days of winter, it doesn’t take long to bring the workshop up to a decent working temperature and this last winter has been one of my busiest in the last few years with more items being made in 8 months than the previous 2 years combined!

Workshop

I’ve found my mojo again, my love of turning has bloomed! My aim of this blog is for me to share some of the techniques that I’ve learned, show off some of my pieces and to provide a place where members of my work community, can come and have a look at the non IT side of me.

Paul.