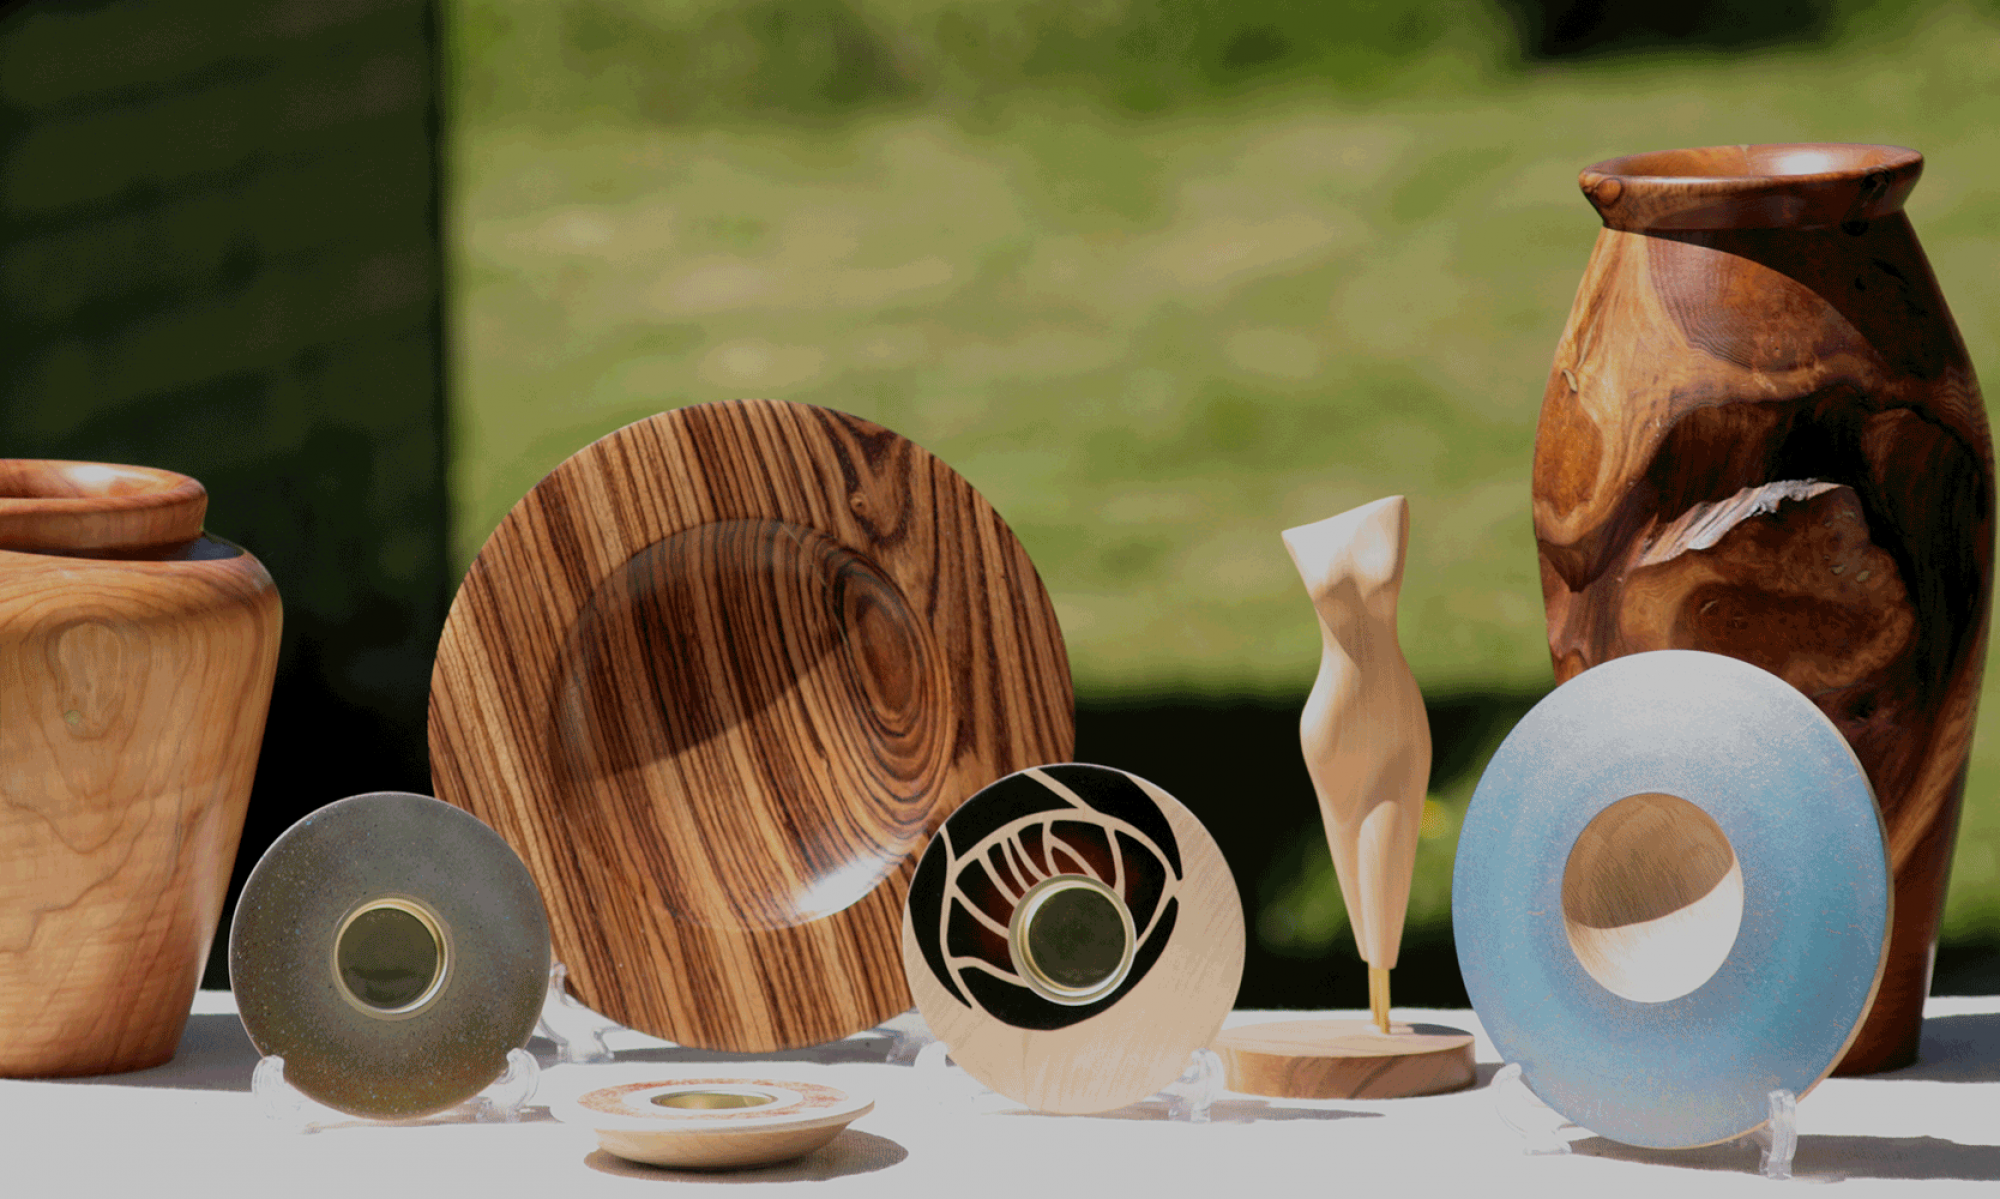
I’ve always been a fan of people like Nick Agar and Binh Pho who extend the boundaries of wood turning by combining additional media into their work.
Both are heavy users of colour and in particular the application of colour with airbrushes and indeed it was having Nick Agar attend and demonstrate at our club in 2016 that made me decided to upgrade my old (and rather rubbish) hobbyists airbrush for a much more professional and capable model.
Nick’s demonstrations to the club showed the use of airbrush masking to create complex designs by allowing colours to be blended in defined areas as well as giving the ability to create crisp art without needing a strong ability in freehand drawing. This is a good thing as I am really not any good at drawing, gave watercolours a try during an early search for a hobby but that withered away when I realised that I just wasn’t very good at drawing. What I am good at is computers, so taking a photo and creating a stencil from it is quite easy to achieve. When you then combine this stencil with airbrushing and wood turning we can create some quite stunning effects which I hope to bring to you via the pages of this blog!
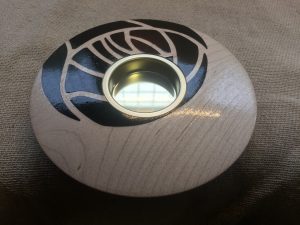
For this first making of post, I want to show how we took a simple Charles Rennie Mackintosh design of a Rose and turned it into a wonderful Art Nouveau tea light holder for scented candles.
I needed a photo of a CRM design to start with, so I turned to google and found a suitable source image to start from. With this image loaded into Photoshop, I used the magic wand tool to start outlining the coloured areas that I wanted to form my stencil. With the selection placed over a fresh canvas, the stroke tool with a 1 pixel grey brush quickly places our stencil outline.

With the stencil ready in Photoshop and set to roughly the right size (10cms wide) for the tea light holder, I printed it directly onto the Artool Ultra Mask film that I was using. This great masking product happily runs through the ink jet, but you must remember to use a mid tone grey and set the inkjet to glossy paper, otherwise you end up with too much ink on the mask and it doesn’t dry.
That done, it’s off to the workshop to select a small piece of Maple (about 15 centimetres square. Drill a small mounting hole suitable for my screw chuck and then turn it to round.
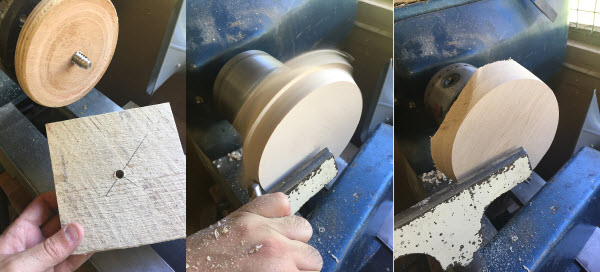
Once the piece is running true, it’s time to turn a chucking point suitable for the C jaws on my Axminster chuck, then turn the piece around, true it up and then create a smooth face with a gentle curve out from the centre.

Both sides were sanded smooth to 600 grit.. note the close extractor nozzle to remove the dust while sanding.. Wood dust is no joke and very harmful. I also have an ambient air filter running and most often wear a dust mask too.
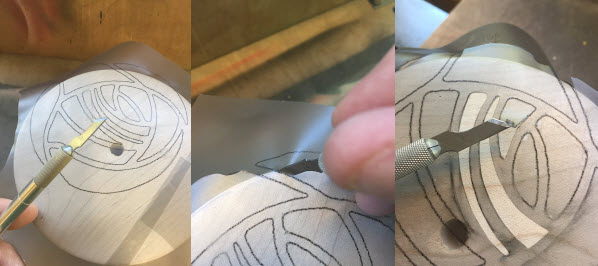
With the backing paper removed, the mask is placed over the prepared piece, with the image offset to the top left. My plan will be to remove the hole for the tea light holder after the airbrush work is complete, but I don’t want to lose the whole design. With the mask attached, it’s time to cut out the pieces that I want to remove. (Note the type of blade. It’s a short acute angle blade which I find has less drag in the mask than a normal scalpel blade. I also find that if you point the heel of the blade at the line your following it makes it much easier to stick to the line.)
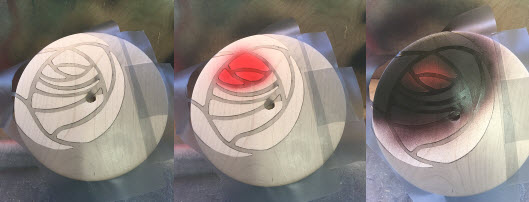
With the mask firmly in place (I usually lay the backing film over the top and rub it firmly with a cloth which avoids getting too many oils from your fingers on the piece.) it’s time to start colouring. For this particular rose, it’s going to be a heavy black for the most part, with a hint of red peeking through. For this effect we have to start with the bright red (A few drops of Golden Hi-flow Naphthol Red Light) , so here I use the airbrush to lay a solid layer of red over the three central petals. Then I add a few drops of carbon black to the red already in the brush. By covering the nozzle of the airbrush with a cloth and letting the air flow, it causes a backflow into the airbrush paint cup, mixing the two colours for me. This allows me to start blending in black with a hint of red from the outside into the centre, leaving a small areas of red showing through.
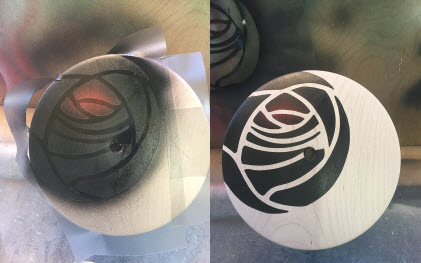
Finally a few more drops of carbon black into the airbrush and another mix before filling in the final parts of the mask. After a few seconds, the final paint is dry and we can remove the mask from the piece, leaving a perfect image of the rose on the work (You can see the used mask on the backboard).
At this point, I then give the work around 5 coats of acrylic lacquer. This takes about and hour and a half to allow each coat to dry. Just before the final coat of lacquer I cut back the surface very gently with some 12000 grit micro mesh.
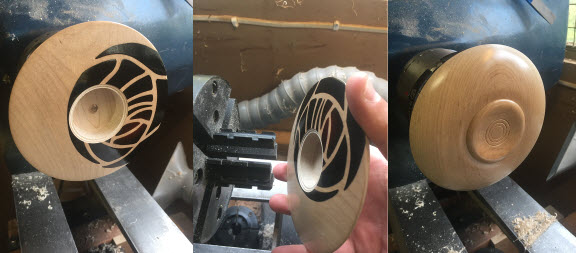
With the lacquer fully cured, it’s time to hollow out the recess that the tea light cup will fit into. Then the piece is reversed onto a set of pin jaws and the chucking point turned into a pleasing foot with some decoration (no one likes an ugly bottom!)
The base is sanded to 600 grit and blended to the already finished area and then a few coats of lacquer applied to the base using the same technique.
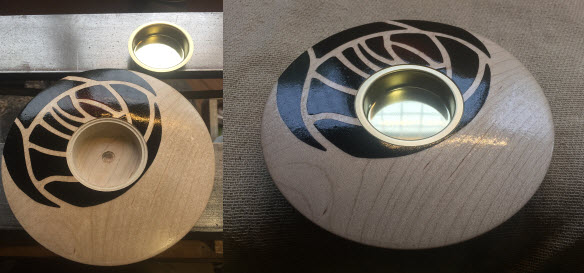
With the lacquer hardened all over, I glue in the tea light insert with a couple of drops of glue in the end grain area of the recess to allow for movement int he wood.
Finally, I give the piece a quick coating of renaissance wax to protect it from fingerprints and we’re done.
Paul.